I know quite a few of you guys have been asking about our recent DIY projects around here (actually, quite a few of you included DIY on the blog survey!), so I wanted to share some more details with you!
I know I mentioned my obsession with the blog once before, but both of the projects we did came courtesy of the blog Shanty 2 Chic.
The first project we did was their DIY Shelf with Hooks <—check out the original post for all step by step instructions!

As you can tell from the wall BEFORE, it was definitely in need of a little updating…

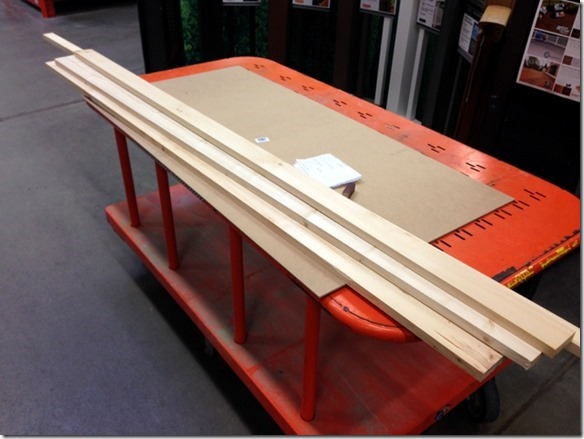
Jay and I had a lot of fun going out and picking up the supplies that we’d need, and had even more fun putting it all together.
When I originally told Jay I wanted to tackle these projects, I really thought I was going to be able to do them on my own. HA! No, definitely not. Granted, I’m not saying YOU can’t, but I am just not that savvy with a table saw, or band saw, or whatever the heck they’re called.
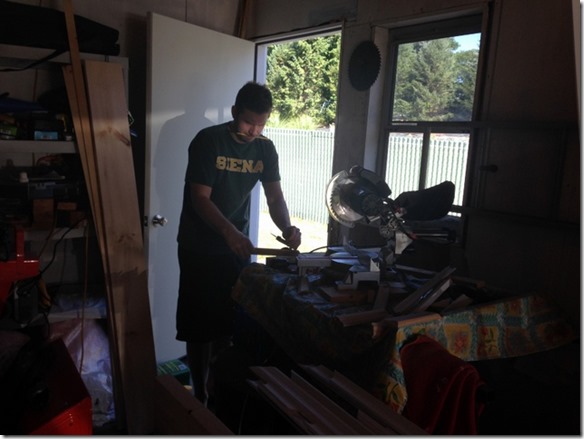
I did, however, learn how to work a nail gun like a champ!

Although, do as I say and not as I do, and be sure to wear protective eye wear (preferably, cute and girly pink ones). I was a dummy and did not.
So back to the project…we basically just followed the directions on the DIY Shelf with Hooks post to a T, with a few minor adjustments. So okay, maybe not to a T.

The main difference was our choice of wood stain. While we loved the look of the white, we thought it’d look nice to try and find a stain that somewhat matched our cabinets. We ended up finding this Minwax Wood Finish in Red Chestnut, and we were absolutely thrilled with the results.

To mount the shelf, we had to use some pretty big screws and we didn’t really want the look of them to show on the front of the board. So Jay ended up using a larger size drill bit to somewhat hollow out over the screws and we covered them up with these button plugs.

You can see them in the photo below, but they blend in really well. This wasn’t in the original plans, but I’d totally recommend it.

We also ended up going with brushed nickel hooks to match the rest of the hardware in our kitchen, which we found at Hobby Lobby (a very, very dangerous store!).
The second project we attempted was the Chalkboard with Key Hooks <—check out the original post for all step by step instructions!

Jay wound up doing the majority of this project just due to logistics (tough for both of us to work on when the babe is awake!) but he did an amazing job.

Again, we followed the original post as outlined, but one thing we did notice and had to improvise a bit with was that one of the templates (Template B) they give you is a bit off.

We wound up having to cut down the backs of those pieces (the two dividers shown above) in order for them to line up correctly with the rest of the boards. I don’t remember how much we had to cut it (sorry!) but just bear in mind that if you do use the template, you’ll have to cut off a bit more.

We used the same stain that we did for the first project, although we were a bit disappointed that, for whatever reason, the wood pieces we got for this one didn’t take the stain evenly (you can see the putty marks below, despite the fact that they were sanded completely).

Ahh well…gives it character, right? ![]() We also purchased these hooks at Hobby Lobby, but I’ve seen them all over.
We also purchased these hooks at Hobby Lobby, but I’ve seen them all over.
One thing I was really excited to purchase, to go along with our snazzy new chalkboard, was this Chalk Ink pen.

I always wondered how people always got such neat writing on chalkboards and now, I can see why!
 And also, please note I had to go and edit all of these photos to get rid of that damn apostrophe.
 ![]()
So that’s the rundown of our intro to DIY projects! I’d say that I’ve most definitely been bitten by the DIY bug, and I feel like Jay sort of has too. There’s a bunch of stuff that we’d love to do, so we’ll have to see what comes up next!
How about you guys? Are you into DIY stuff? Have you done any cool projects lately or have your eye on any good ones? Feel free to share away!


I’m also really into to DIY projects right now. Your’s look awesome! I’d love to see anything else you do.
I am that person who gets into a project that is way too much work or I screw it up. Haha. Pinterest is best for looking for me
Both of those are so fun! I’ve been wanting to do another DIY project for our house and I think this winter it will get done. My husband just built a cat tower (why I don’t even know…) and we built our huge deck this summer. We needed a bit of a break on DIY haha
These look so great! What is the gray color on your wall? I can’t seem to find a gray that doesn’t look blue or green but yours looks truly gray!
I love Hobby Lobby, but much like Chick Fil A the only time you ever think to go there is on Sunday, when it’s closed.
wow, awesome job, you two! these look great. it baffles my mind that people can make stuff like this out of wood. i’d have no idea where to start, except for maybe calling a guy who knows how to make things. :)
I love the chalkboard! I would love to do more DIY projects but sadly our one bedroom apartment doesn’t leave much room for that! Our biggest project lately was clearing out a bookcase to make more room for baby!
I LOVE the board!! That is way too cute. I never make my own things, but I know its easier and cheaper sometimes!
SO crafty! I’ve been bitten by the diy bug too! must be the fall weather :)
Looks awesome! Love it. :-)
Those chalk boards on top of the shelf… did you do those yourself? LOVE them!
Haha, nooooo didn’t do those. I found them on GroopDealz one day for a really good price! https://www.groopdealz.com/
If I told you how long I spent on the Shanty 2 Chic blog, you’d laugh!!! LOVE that blog. And oh my goodness, your projects turned out fantastic!!!! Awesome job!!
Yeah, that Shanty 2 Chic blog is daaaaangerous since you introduced it to me. ;) I have all sorts of ideas in my head! We’ve been doing little DIY projects here and there since we’ve moved in, but I have MORE I want to do! Doing home projects with Cody is one of our favorite things to do together. You guys did a great job on both of these projects!
Unfortunately, my little city apartment does not afford me the space or opportunity for much DIY. I love what you’ve done and hope to be able to create my own cool stuff when I live in a house one day. Good work!
I give you a lot of credit for tackling DIY projects involving any type of saw or nails. And they turned out so good! Hehe, good to know about the apostrophe. ;) Love these!
I wish I would get bitten by the diy bug – my house needs some love and attention! I love both the projects that you made. The chalkboard key holder would be awesome for holding mail rather than throwing it on the counter. I would love one of those! I just don’t feel like making it!
Oh my gosh! These are all amazing & look so, so good. I wish I’d get bitten by that DIY bug….I’ve not got a creative bone in my body. Eek! But this is pretty dang inspiring!
Courtney, you guys did suuuuch an amazing job! I agree that oftentimes, projects seem like a cinch in our minds till we find out that, uhhhh they take way longer to complete. That always happens to me, hah! I also love the color you chose as it looks elegant and extremely professional. :)
Thanks so much, Ellie!
Luckily my husband is SUPER handy and he ended up making most of our wedding decorations and even an amazing barn board shelf for under our TV. How did you make those chalkboard signs over your coat hanger? I love them!!!! I can’t wait to see what else we can come up with! Something about knowing you made it yourself just makes the piece so much more special!
Love these projects! Keep ’em coming!
That’s so awesome!! I actually found the prints on GroopDealz one day for super cheap https://www.groopdealz.com/
These look so great! What is the gray color on your wall? I can’t seem to find a gray that doesn’t look blue or green but yours looks truly gray!
Oh gosh, I’m sorry, I have no idea! We painted the kitchen a few years ago…it’s actually somewhat of a purple-y grey, so I wouldn’t say it’s truly grey. It totally depends on how the picture comes out, haha!
No problem. It looks great! You are right the picture and lighting often have a lot to do with the look. We have tried more than 10 grays and can’t find a perfect one.
We had a terrible time finding a gray for our house, too! We used it as the main color throughout, & depending on the lighting in the particular room/area, it can look totally different from space to space. It actually looks mauve in some areas. Ugh! It was a HUGE chore to paint it all, tho, so we’re gonna live w/ it for quite awhile.
These are some amazing DIY projects! I wish my hubby and I were handy. I’m sure if we had step-by-step we could tackle it and it might be a nice (new) test for our marriage! haha